Once you have created a meeting with preferred agenda and content, you can run the meeting. Each meeting progresses through 5 different meeting phases:
- Preparation, where you will make final adjustments to the agenda and contents
- Invites, where you will send invites to participants and they can comment on the topics
- Running, where you will progress through the agenda and record discussion, decisions and tasks
- Closing and minutes, where you will make last adjustments to your meeting notes and generate the meeting memo
- Archived, where you will permanently close the meeting and save the discussion and decisions to the service
You can change the meeting phase simply by clicking it. While the phases are planned to be carried out in the beforementioned order, you can always return to previous phases or skip phases, if necessary.

1. Preparation
When a meeting is generated (from scratch or based on a meeting series) it's set to Preparation-phase which allows the facilitator to make final adjustments to the agenda and contents before sending the invites and allowing participants to see the meeting. The facilitator can freely edit the sections, content, participants and general meeting information.

2. Invites
When the meeting's agenda and content is ready, it's time to invite the participants, so that they can familiarize themselves with the agenda and comment on the topics. Once the meeting has been moved to Invites-phase, the service offers to send the invites to all participants and the comments-area opens up to the right side of the sections.
.png)
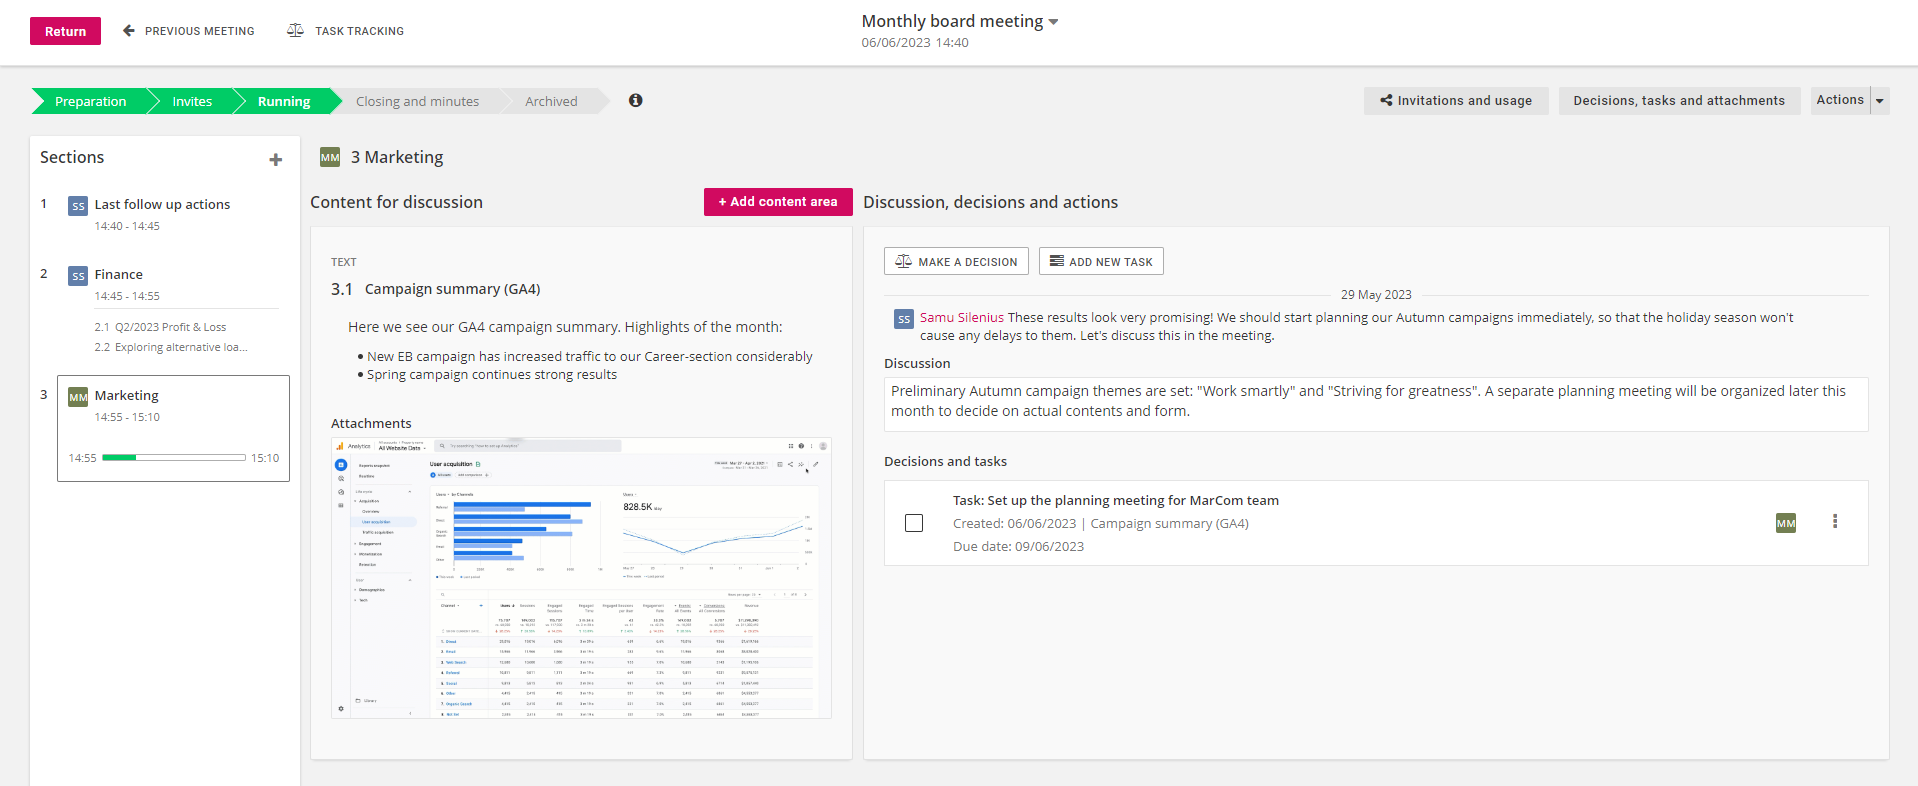
3. Running
When the meeting is about to begin, it's time to set it as "Running". This activates the discussion, decisions and tasks for the agenda and the time reservations for each section:
- Discussion is meant to record general notes and remarks about the topic at hand. Basically anything that you would like to include in the meeting minutes-file.
- Decisions* can be used for official decisions that need to be recorded separately to the meeting minutes-file. Decisions also have "reason"-field, where you can give more background.
- You can also assign Tasks*to other users that are related to the topic. You can define a deadline for the task and give a "reason" for the it, if you want to give more background for the assignee. Tasks appear on user's home page and you can begin your meetings by going through the open tasks from last meeting.
- Time reservations show how much time has passed out of the planned time reservation to help you stay on schedule and increase your awareness of time spent in each section and topic.
4. Closing and minutes
Once you have gone through the meeting agenda and recorded the discussion, decisions and tasks, it's time to set it to "Closing and minutes". After you move to this phase, the meeting is closed and the closing time is stored into the service. Now is your final opportunity to do final adjustments to the meeting and the recorded items before you generate the meeting minutes-file. Once everything is ready, you have a few options to generate your meeting minutes:
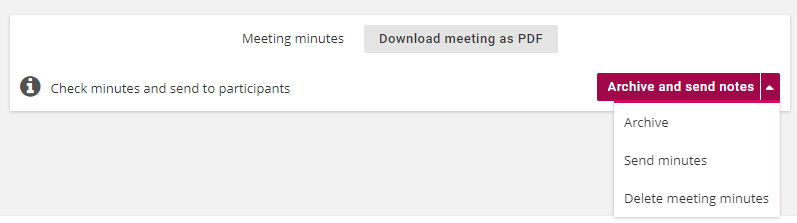
- Create meeting minutes pdf-file creates a pdf-file of the meeting agenda with selected content types. You can toggle following content on/off:
- Topic description (= the description texts inserted for each topic)
- Comments (=the comments that were left before the meeting was set as "running")
- Notes (=the discussion that was recorded after the meeting was set as "running")
- Decisions (= official decisions made during the meeting)
- Tasks (= tasks assigned to users)
- Pdf attachments (= any pdf-files that were attached to the topics)
- Topic graph screenshots (= any screenshots from the graphs that were included in the agenda)
- Upload my meeting minute (pdf) which allows you to upload an externally created meeting minutes-file to the service.
- Generate meeting minutes docx-file creates the meeting minutes with selected content in docx-format that you can edit with e.g. Microsoft Word or Google Docs and upload back to 4straction as pdf. The supported content types for the docx-print are similar to the "create meeting minutes pdf-file" with the exception of pdf attachments are not supported.
- Invite meeting minutes editor allows you to send a request to another user to come generate the meeting minutes. The invited user has the same opportunities as listed in this section.
- Archive skips the meeting minute generation completely and immediately archives the meeting.
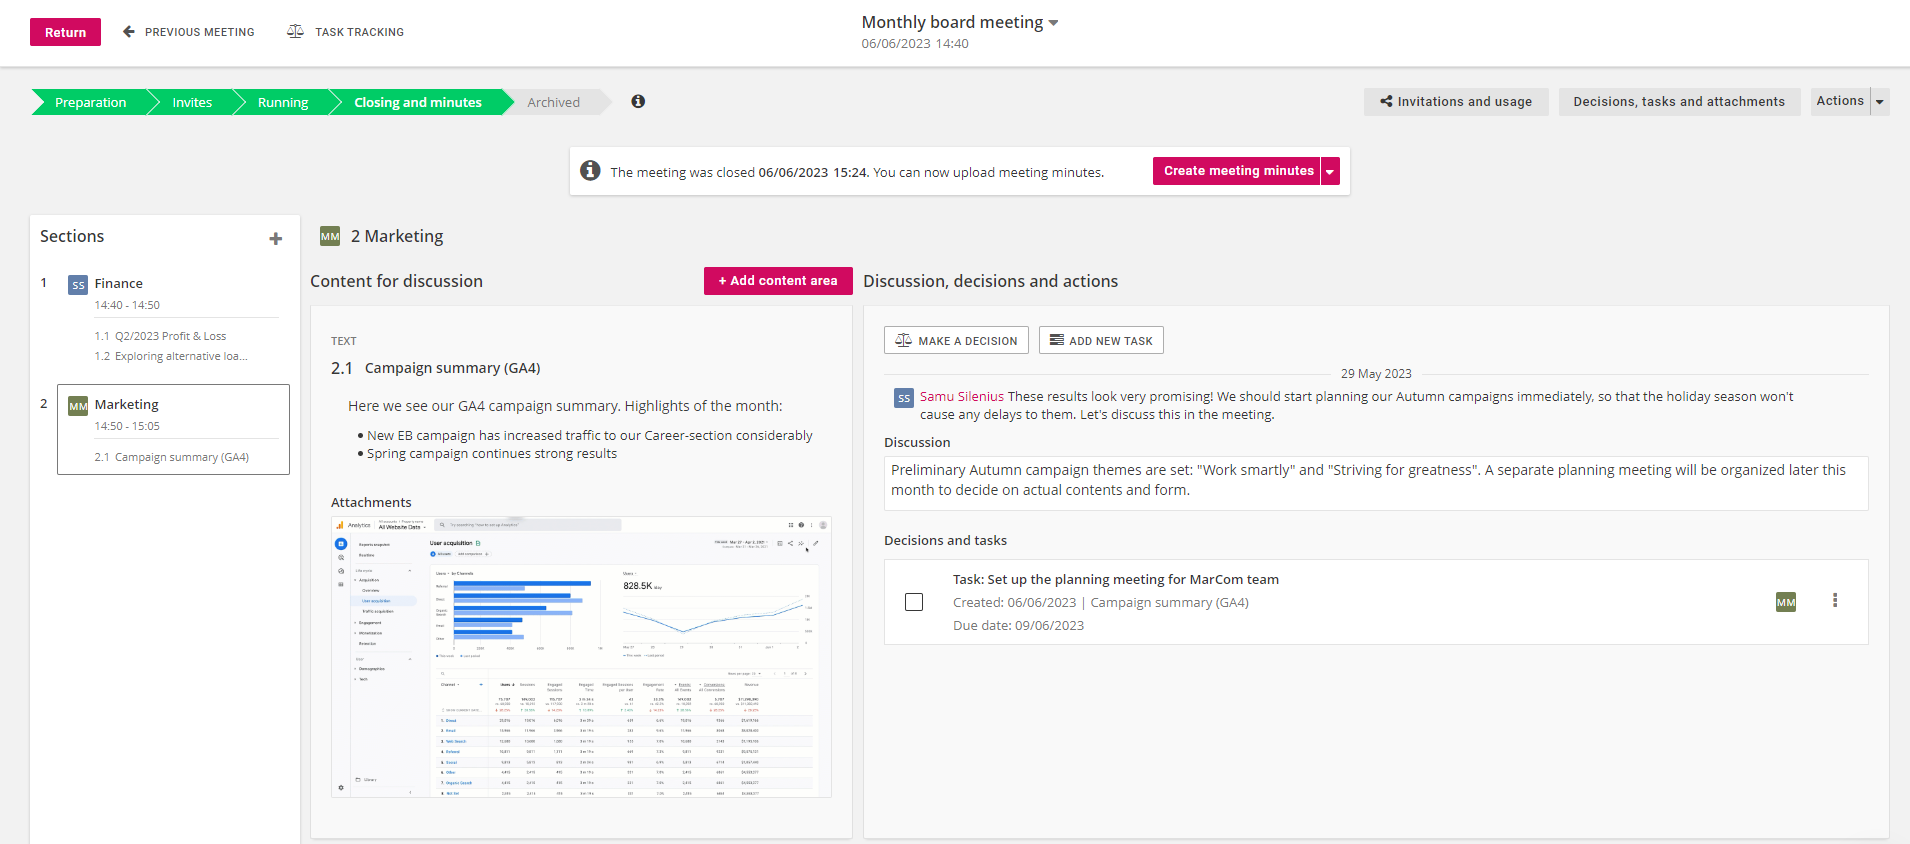
Once the meeting minutes-file is ready in the service, you can download and check the file, and then archive the meeting and send the file to participants if everything is ready. If you notice errors in the file, you can delete the meeting minutes-file and start the generation from the beginning.
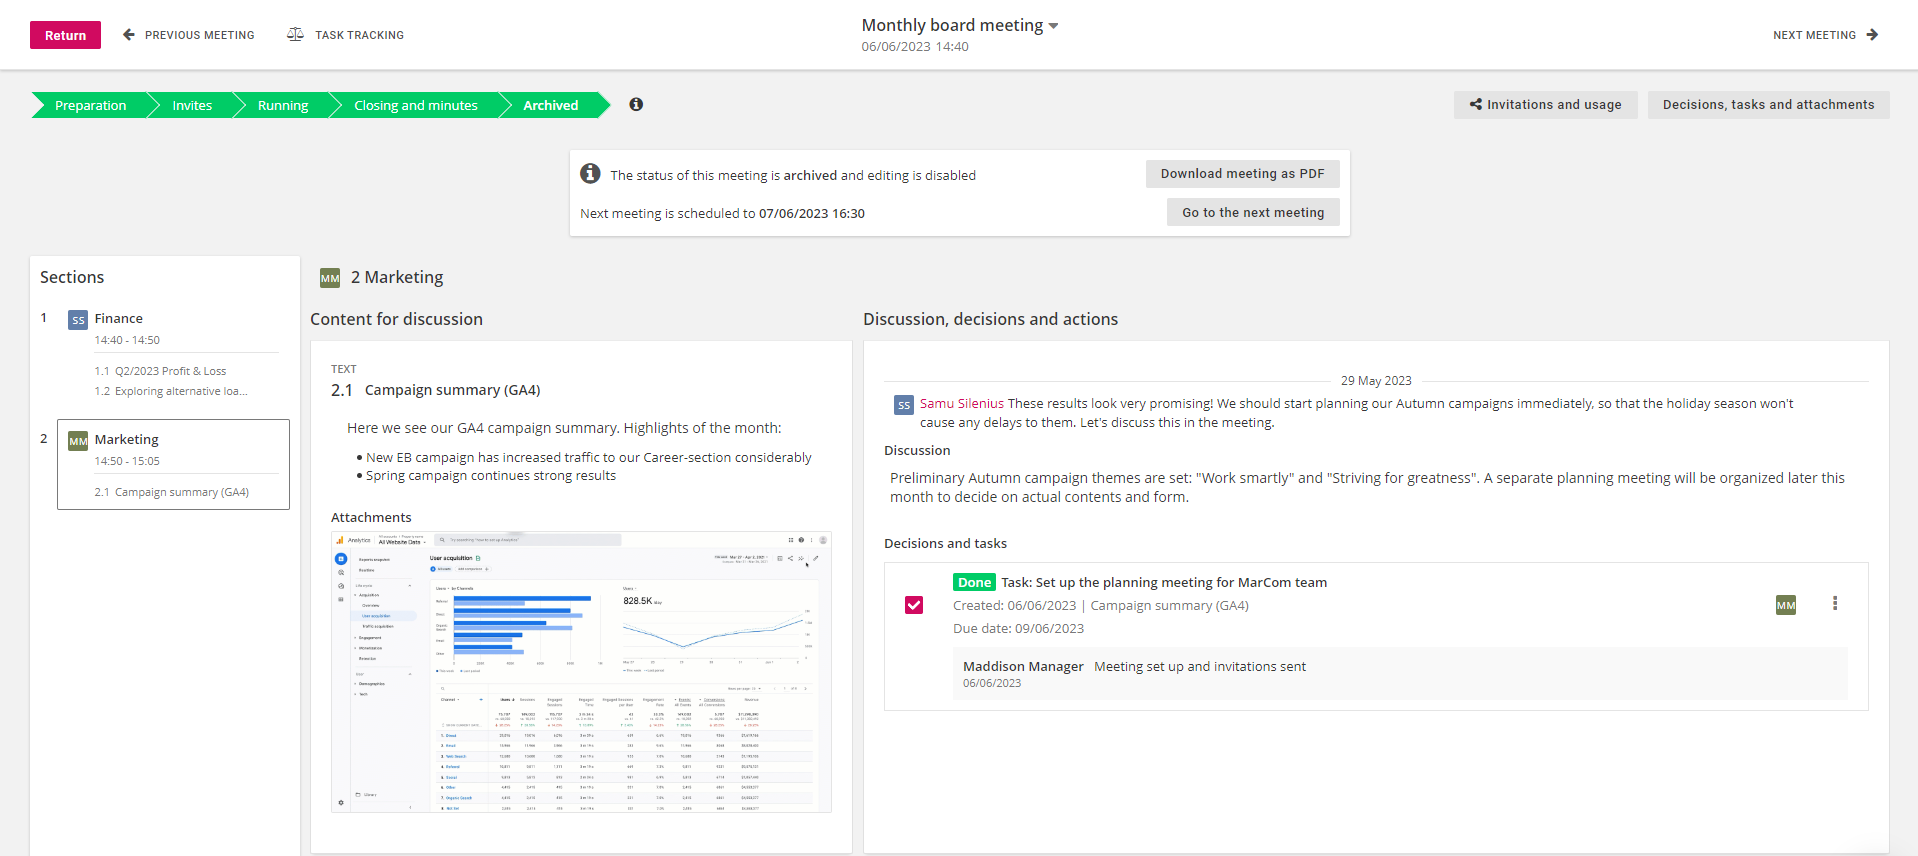
5. Archived
Once the meeting is finished, it's time to "Archive" it. This disables all changes to the topics and "freezes" any in-service content (e.g. graphs or objectives) to their current state.
Archiving allows you and the participants to re-visit the meeting and its contents later on. The meeting minutes download-button as well as the next meeting in the same meeting serie is promoted in the middle of the page for convenience.